Monday 31 August 2020

Dressmaking | Tools And Equipment - Cutting

Good Day


Sewing Nuggets Of The Day


This blog posting is being done from me this morning when refreshing my reading from some books to which I was taking an online course a few years ago with Penn Foster Dressmaking and Design.  I was reading through the Module 1 Introduction To Sewing.  I decided to then, post my blog posting around the topic.  The subjects read this morning were on:


Introduction To Sewing  - Tools And Equipment - Cutting 

Dressmaking shears

Cutting Table

Yardstick

Tape measure

Straight pins


They are essentials used at all times when dealing with “cutting”.   


Thank you and have a good day. 


Dressmaking |  Tools And Equipment

Essential Tools And Equipment For Cutting 


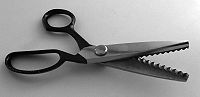
Pinking shears are scissors, the blades of which are sawtoothed instead of straight. They leave a zigzag pattern instead of a straight edge.

The pinking shears design was patented by Louise Austin in 1893.[1] In 1934, Samuel Briskman patented a pinking shear design (Felix Wyner and Edward Schulz listed as the inventors).[2] In 1952, Benjamin Luscalzo was granted a patent for pinking shears that would keep the blades aligned to prevent wear. [3]

Pinking shears have a utilitarian function for cutting woven cloth. Cloth edges that are unfinished will easily fray, the weave becoming undone and threads pulling out easily. The sawtooth pattern does not prevent the fraying but limits the length of the frayed thread and thus minimizes damage.[4]

These scissors can also be used for decorative cuts and a number of patterns (arches, sawtooth of different aspect ratios, or asymmetric teeth) are available. True dressmaker's pinking shears, however, should not be used for paper decoration because paper dulls the cutting edge.

https://en.wikipedia.org/wiki/Pinking_shears


Cutting Table


People also ask

How big should a sewing cutting table be?

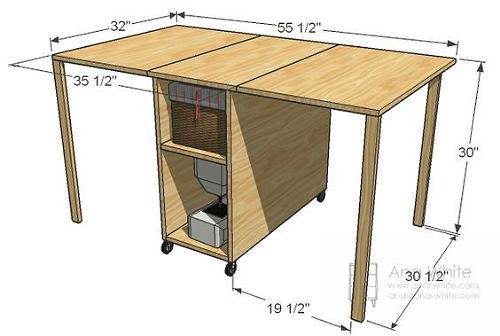
The ideal cutting table is about three feet wide, four feet high and at least six feet long. It also has storage shelves and drawers underneath to hold sewing and ironing supplies, fabric and all of your other sewing room essentials.


What is the best height for a sewing table?

Most sewing table heights are based on a person 5 feet 3 inches tall. However, the average ranges from 4 feet 6 inches to 5 feet 3 inches, and of course you may actually be taller than 5 feet 3 inches. The suggested table height for the average 5-foot 3-inch person is around 28 inches.


What can I use for a sewing table?

A kitchen or dining room table can serve as a sturdy sewing machine table. Do not use a folding card table as the vibration from the sewing machine will cause it to bounce all over such a flimsy table. An economical option for a sturdy table is to watch thrift shops and yard sales.


What is a cutting table?

In a fabric store, a cutting table is usually a long surface with a built-in yardstick on one edge and a long groove for scissors going across the center. ... But remember, if you don't own a table that was specifically made as a cutting surface, always protect it with a cutting mat before you cut fabric on it.


Yardstick 


A meterstick[1] or yardstick[2] is either a straightedge or foldable ruler used to measure length, and is especially common in the construction industry. They are often made of wood or plastic, and often have metal or plastic joints so that they can be folded together. Normal length of a meterstick made for the international market is either one or two meters, while a yardstick made for the U.S. market is typically one yard (3 feet or 0.9144 meters) long.

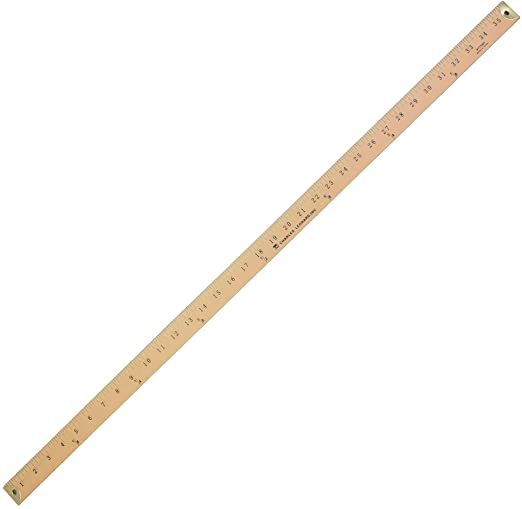
Metersticks are usually divided with lines for each millimeter (1000 per meter) and numerical markings per centimeter (100 per meter), with numbers either in centi- or millimeter. Yardsticks are most often marked with a scale in inches, but sometimes also feature marks for foot increments. Hybrid sticks with more than one measurement system also exist, most notably those which have metric measurements on one side and U.S. customary units on the other side (or both on the same side). The "tumstock" (literally "thumbstick", meaning "inch-stick") invented in 1883 by the Swedish engineer Karl-Hilmer Johansson Kollén was the first such hybrid stick,[citation needed] and was developed with the goal to help Sweden convert to the metric system.

https://en.wikipedia.org/wiki/Meterstick


A tape measure or measuring tape is a flexible ruler used to measure size or distance.

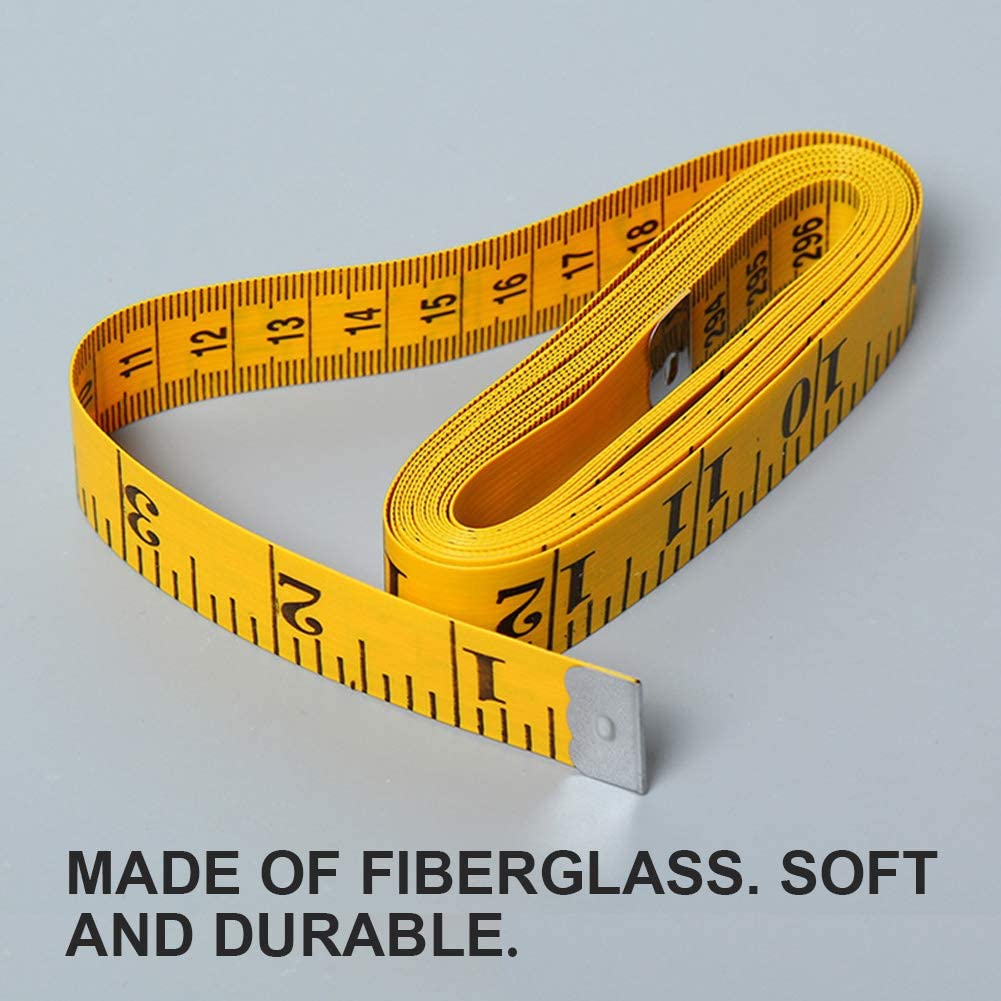
It consists of a ribbon of cloth, plastic, fibre glass, or metal strip with linear-measurement markings. It is a common measuring tool. Its design allows for a measure of great length to be easily carried in pocket or toolkit and permits one to measure around curves or corners. Today it is ubiquitous, even appearing in miniature form as a keychain fob, or novelty item. Surveyors use tape measures in lengths of over 100 m.

https://en.wikipedia.org/wiki/Tape_measure


Pin - Wikipedia

en.wikipedia.org › wiki › Pin

Jump to Straight pins - Straight pins These pins have a head bent into a capital letter "T" to make it easier to grab with the finger tips. The most common type of sewing pin, they are used for light- to medium-weight fabrics and may have either a small flat head or a round plastic one.

Straight pins[edit]

Pin type

Typical size[Note 1]

Typical length

Features

Beading pins

14

78 in (22 mm)

A wider-than-usual-head allows this pin to hold beads more easily.

T-pins

0.75 mm

1


14 in (32 mm)

These pins have a head bent into a capital letter "T" to make it easier to grab with the finger tips.

Dressmaker pins

17-20

1


116 in (27 mm)

The most common type of sewing pin, they are used for light- to medium-weight fabrics and may have either a small flat head or a round plastic one.

Pleating pins

17

1


116 in (27 mm)

Considered "extra fine", they are used for pinning pleats and lightweight fabrics.

Appliqué pins

0.6 mm

34 in (19 mm)

Pins have small round glass heads that are easy to work around; also, because the pins are comparatively short, they are less likely to "stick out" when holding small pieces of fabric against a larger one.

Bridal and lace pins

17

1


14 in (32 mm)

These pins are made entirely of stainless steel and will not rust; they are used for fine and lightweight fabrics.

Patchwork pins

22 (0.5 mm)

1


716 in (37 mm)

Pins have extra sharp tips for penetrating thick iron-on patches; their size and length also make them suitable for quilting; they have glass heads that will not melt if pressed in an iron.

Quilting pins

30 (0.6 mm)

1


78 in (48 mm)

Quilting pins are exceptionally long and often have glass heads.

Silk pins

0.5 mm

1


716 in (37 mm)

Silk pins are suitable for lightweight fabrics and have a glass head that will not melt when ironed.

Pearlized pins

24

1


12 in (38 mm)

These have round plastic heads which have been painted (often in bright colors) to superficially resemble the appearance of pearls.

Sequin pins

8 (0.5 mm)

12 in (13 mm)

Their exceptionally short length makes these pins suitable for appliqué; a large flat head makes them able to hold sequins in place.

Tidy pins

-

1


12 in (38 mm)

U-shaped pins with no head are used for holding slip covers and doilies in place; often made of brass so that they will not rust; also called fork pins.

Hatpins

-

8 in (20 cm)

These are exceptionally long decorative pins used to hold a woman's hat in place.


https://en.wikipedia.org/wiki/Pin#Straight_pins


Save on sewing supplies at www.CreateForLess.com.
 Save on quilting supplies at www.CreateForLess.com.
  Save on Sewing & Quilting Supplies at CreateForLess!

Tuesday 25 August 2020

Sewing Nuggets Of The Day

Sewing Nuggets Of The Day

GRAIN 
  • Fabric grain is the way the thread that makes up the fabric travels. 

  • Lengthwise grain runs horizontal to the selvedge or the length of the fabric.  Lengthwise grain is usually used to run the length of a garment.

  • Crosswise grain runs perpendicular to the lengthwise grain.  Crosswise grain usually runs across or around a garment.

  • Bias grain is the grain that runs at a 45 - degree angle to the straight grains of fabric.  Bias hangs differently from straight grains.  Bias tape is cut from the bias grain and has more "give" when enclosing around areas.

  Quote above is from page 37 of Chapter 3 of Teach Yourself Visually Sewing by Debbie Colgrove.


Save on sewing supplies at www.CreateForLess.com.
 Save on quilting supplies at www.CreateForLess.com.
Save on Sewing & Quilting Supplies at CreateForLess!

MSQC All Stars Block of the Month 7 - Twinkle


Save on sewing supplies at www.CreateForLess.com.
Save on quilting supplies at www.CreateForLess.com.
Save on Sewing & Quilting Supplies at CreateForLess!

Mini Quilt Project - Sewing, Quilting etc. By ShirleyAnn Pearman

Sewing, Quilting etc. By ShirleyAnn Pearman


Save on sewing supplies at www.CreateForLess.com.

Save on quilting supplies at www.CreateForLess.com.

 
Save on Sewing & Quilting Supplies at CreateForLess!


Monday 17 August 2020

FACE MASK AND PURSE

FACE MASK AND PURSE 


Face Mask And Purse


  1. Notions:  Quarter (¼) yard Fabric; fusible interfacing, 2  8 inch x ¼ inch elastic, thread

  2. Pattern:  10 inch circle for face mask; mini purse pattern example Simplicity 5606 (F)

  3. Cut out a 10 inch circle for the face mask

  4. Fold in half and then fold again to quarter.  Press for pattern.  Cut out on pressed lines. 

  5. Match each quarter and put the right sides together.  Stitch on the rounded surface to a ¼ inch seam.  Take a pair of small scissors and slit slightly on curves.  Press and open.

  6. Cut out interfacing to match either in two or on the fold to one.  Press to the wrong side of above (5).

  7. Match the right sides together and pin to stitch a ¼ inch seam.  Leave a bit of opening to one corner to enable the turn inside out. 

  8. Slit the corners with small scissors to help with shaping the corners.   Press and turn inside out.  Press again.  Hand stitch the little opening on the seam to enable closing.

  9. At each side, turn down ¼ inch and then another to enable casing for elastic.  Press and stitch down.

  10. Cut two 8 inch elastics.  Push through the casing.  Match the ends and stitch.  Push stitched ends inside the casing. 

  11. Cut 4 pieces of pattern for purse

  12. Match each piece and put the right sides together.  Pin to stitch a ¼ inch seam.  Slit with small scissors to help out with rounding the corners.  Press and open.

  13. Cut 2 pieces of interfacing and iron to the wrong side of 1 of above (12).

  14. Match the right sides together and pin to stitch a ¼ inch seam.  Leave a bit of opening at the top to enable turning inside out.  Press and open.  Turn inside out.  Press.  

  15. Optional.  Make a covered button and elastic casing to make a closure. 


To make smaller masks use a smaller circle of 9 inch or 8 inch.


The entire project from beginning to end was done by ShirleyAnn Pearman. (Cutting out pattern, putting together, stitching, pressing, hand stitching, photography, video, blogging etc.)


Copy of a pdf version with full instructions and photos.


I purchased the fabric for this project from Amazon of a package of Fat Quarters.


THANK YOU FOR YOUR SUPPORT.


****************************


This video inspire me this weekend to do this project this weekend.   Thank You.


Save on sewing supplies at www.CreateForLess.com.
 Save on quilting supplies at www.CreateForLess.com.
  Save on Sewing & Quilting Supplies at CreateForLess!

Friday 14 August 2020

Homemade Cosmetic Bags

Homemade Cosmetic Bags


Supplies Needed To Make These Bags

Simplicity Accessories Pattern 5535 
Fabric Bag front and back 3/8 yard and 3/8 yard Band to Bag 
12 inch zipper
Thread
Optional:  Quilting Batting 


Kwik Sew Pattern 3249
Fabric Bag front and back 1/2 yard 
Lining front and back 1/2 yard 
9 inch zipper
Thread
Optional:  Quilting Batting 


These two patterns are great to work with in making these types of bags.   I had the privilege of adding quilting batting to them which give them a little cuddly effect of softness that feels cushiony.  If you like any quilting stitch can be used too to give the quilting effect besides using the batting. 

Fabric used here was a general cotton fabric purchased from Gibbons Company in Bermuda.

Bags were made by ShirleyAnn Pearman 
Photography by ShirleyAnn Pearman

******

Oleander Tree -  Photography by ShirleyAnn Pearman


Save on sewing supplies at www.CreateForLess.com.
 Save on quilting supplies at www.CreateForLess.com.
  Save on Sewing & Quilting Supplies at CreateForLess!

Wednesday 12 August 2020

Sewing Environment At Home - Continues from yesterday's post.

My Little Sewing Environment At Home
Continues from yesterday's post

Please click here for yesterday's post:- 


* * * * *


As you can see I utilize the dining room to full capacity for sewing.   You can transform a dining room table to fit not only for dinner entertainment but to fulfil your hobby activities too.  (Smile)  These pictures were just shot this morning to give you the viewer of the blog a more current update, as yesterday's blog post's pictures were taken a while ago. 

Here is a picture of another sewing machine to which I have used over the years too prior to this one which is in good condition too.   However, somehow because of it being computerized it has a tendency to lock at times when sewing.  It is a little different from Singer 7426 which was my mother's, but I like it too.  It is a Shark Euro Pro.  I tried to sell it a while ago but, I gather no one was interested in purchasing.   I have always wanted to invest in a Serger and an Embroidery machine but have not had the opportunity to as yet.    


I am at the moment, as you can see, working on a small quilting project to which I will share with you in a later blog post. 

By for now.  Have a great day. 

Thank You 


Oleander Tree -  Photography By ShirleyAnn


Save on sewing supplies at www.CreateForLess.com
Save on quilting supplies at www.CreateForLess.com.


Save on Sewing & Quilting Supplies at CreateForLess!